
REST API Guide
If you have spent any time around web development you have probably heard the term REST API thrown around in almost every conversation about building software. It sounds intimidating at first, especially if you are new to backend development, but once you understand the core ideas behind it, building your first REST API becomes a genuinely fun and rewarding process. In this guide we will walk through what a REST API actually is, why it matters, and how you can build one from scratch using practical, beginner friendly steps.
What Is a REST API
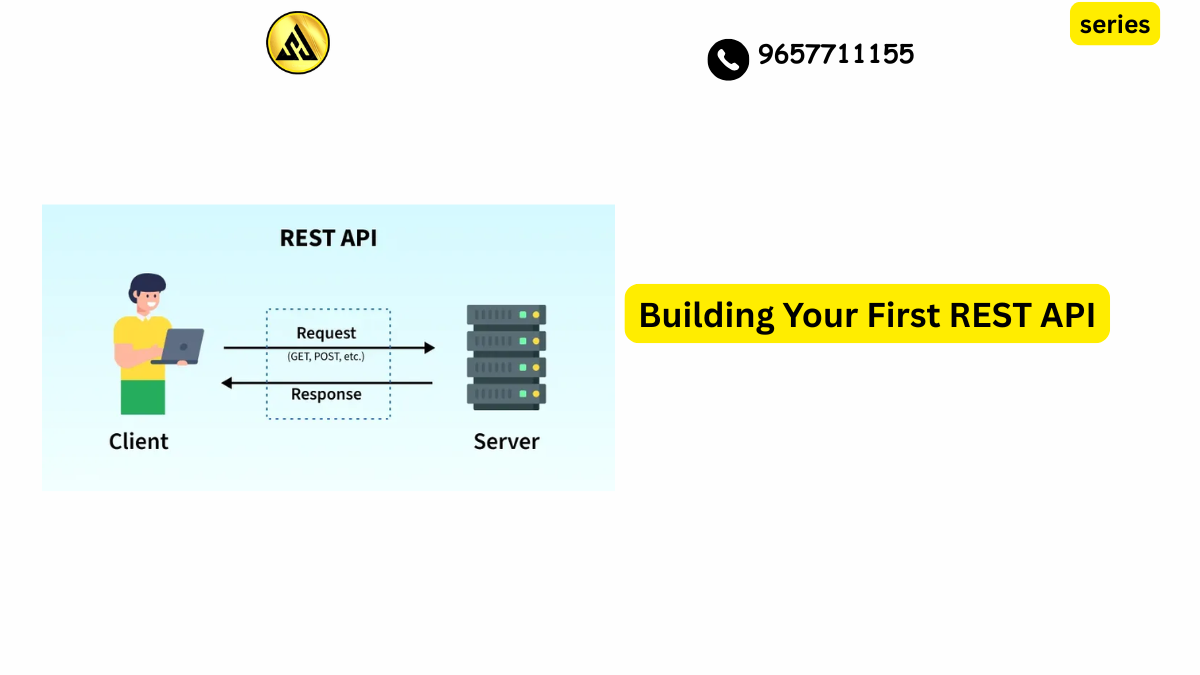
REST stands for Representational State Transfer. It is not a programming language or a specific tool, it is an architectural style for designing networked applications. A REST API is simply a way for two systems, usually a client like a web browser or mobile app and a server, to communicate with each other over HTTP using a standard set of rules.
Think of a REST API as a waiter in a restaurant. You, the customer, do not walk into the kitchen and grab your own food. Instead you tell the waiter what you want, the waiter takes that request to the kitchen, and then brings back the response. In this analogy the waiter is the API, the kitchen is the server, and you are the client making requests.
Why REST APIs Matter in 2026
Modern applications rarely live in isolation. Your mobile app needs to talk to a server, your frontend website needs to fetch data, and increasingly, different companies need their systems to talk to each other automatically. REST APIs make this possible in a standardized, predictable way that developers across the world already understand.
Whether you are building a simple to do list app, a full scale e commerce platform, or connecting to third party services like payment gateways or weather data providers, chances are you will be working with REST APIs at some point. Learning to build one yourself gives you a much deeper understanding of how the web actually works behind the scenes.
Core Principles of REST
Before jumping into code, it helps to understand the handful of principles that define REST architecture.
Statelessness
Each request from a client to a server must contain all the information needed to understand and process that request. The server does not store any information about the client session between requests. This makes REST APIs scalable and easier to maintain.
Client Server Separation
The client and server are independent of each other. The frontend and backend can be developed, updated, and deployed separately as long as the API contract between them stays consistent.
Uniform Interface
REST APIs use standard HTTP methods to perform actions on resources. The most common ones you will use are GET to retrieve data, POST to create new data, PUT or PATCH to update existing data, and DELETE to remove data.
Resource Based URLs
In REST, everything is treated as a resource, and resources are represented by URLs. For example, a list of users might live at slash users, while a single user might live at slash users slash 1.
Setting Up Your Development Environment
For this walkthrough we will use Node.js with Express, since it is one of the most beginner friendly ways to build a REST API and is widely used in real world projects. You will need Node.js installed on your machine, along with a code editor like Visual Studio Code.
Once Node is installed, create a new project folder and initialize it using your terminal. Run npm init to create a package.json file, then install Express using npm install express. This single package gives you everything you need to start handling HTTP requests and building routes.
Planning Your API
Before writing any code, it is worth spending a few minutes planning what your API will actually do. Let us build a simple API for managing a list of books, since it is a relatable example that touches on all the core CRUD operations, meaning Create, Read, Update, and Delete.
Our planned endpoints will look like this. GET slash books will return all books. GET slash books slash id will return a single book. POST slash books will add a new book. PUT slash books slash id will update an existing book. DELETE slash books slash id will remove a book.
Writing Your First Endpoint
Start by creating a file called server.js in your project folder. Inside this file you will import Express, create an app instance, and define a basic route.
You begin by requiring express and creating an app using express(). Then you use app.use(express.json()) so your server can understand JSON data sent in requests. From there you define your first route using app.get for the books endpoint, which simply returns an array of book objects as a JSON response.
For now you can store your books in a simple array in memory rather than connecting to a real database. This keeps things simple while you are learning the fundamentals, and you can always upgrade to a database like MongoDB or PostgreSQL once you are comfortable with the basics.
Handling GET Requests
Your GET slash books route should loop through your array of books and send it back to the client using res.json. For a single book, you will use a route like slash books slash colon id, where colon id is a route parameter. Inside the route handler you can access this value through req.params.id and use it to find the matching book in your array.
It is important to handle cases where the requested book does not exist. If no matching book is found, return a 404 status code along with a helpful error message rather than sending back an empty or broken response. This small detail makes a huge difference in how professional and reliable your API feels to anyone using it.
Handling POST Requests
To allow users to add new books, you will create a POST route at slash books. Inside this route, you will read the incoming data from req.body, which is possible because you already set up express.json() earlier. You will then create a new book object, assign it an id, push it into your array, and return the newly created book with a 201 status code, which signals that something was successfully created.
Always validate incoming data before saving it. If a required field like title or author is missing, respond with a 400 status code and a clear error message explaining what went wrong. This kind of validation prevents bad data from silently breaking your application later on.
Handling PUT and DELETE Requests
Updating and deleting resources follow a similar pattern to what we have already covered. For PUT requests, you find the book by its id, update its properties with the new data from req.body, and return the updated object. For DELETE requests, you find the book by its id, remove it from the array, and return a success message or simply a 204 status code, which means the request succeeded but there is no content to send back.
Testing Your API
Once your routes are written, start your server using node server.js and test it using a tool like Postman or Insomnia. These tools let you send GET, POST, PUT, and DELETE requests without needing to build a frontend first. You can also use curl commands directly from your terminal if you prefer working without a graphical interface.
Testing every route thoroughly at this stage will save you a lot of headaches later. Try sending requests with missing fields, invalid ids, and unexpected data types to see how your API handles edge cases.
Common Mistakes Beginners Make
One of the most common mistakes is forgetting to handle errors gracefully. Wrapping your route logic in try and catch blocks and always sending meaningful status codes will make your API far more reliable.
Another common issue is ignoring proper HTTP status codes altogether and just returning 200 for everything, even when something went wrong. Status codes exist for a reason, and using them correctly helps anyone consuming your API understand exactly what happened without having to read through documentation every time.
A third mistake is skipping input validation entirely. Trusting that every request will contain perfectly formatted data is a recipe for bugs and security issues down the line.
Best Practices for a Professional REST API
As you grow more comfortable with the basics, start incorporating a few professional habits into your workflow. Use plural nouns for resource names, such as slash books rather than slash book, to stay consistent with REST conventions. Version your API using something like slash api slash v1 slash books so you can make changes in the future without breaking existing integrations.
Document your endpoints clearly, either using comments in your code or a dedicated tool like Swagger. Good documentation is often the difference between an API that developers enjoy working with and one that causes constant confusion.
Finally, once you move beyond in memory data storage, connect your API to a real database and consider adding authentication using something like JSON Web Tokens to protect sensitive routes.
Where to Go From Here
Building your first REST API is a milestone that opens the door to countless possibilities. Once you understand these fundamentals, you can start exploring more advanced topics like rate limiting, caching strategies, GraphQL as an alternative approach, and deploying your API to cloud platforms so real users can access it.
The best way to solidify what you have learned is to keep building. Try creating an API for a different type of resource, such as a movie collection or a task manager, and challenge yourself to add features like search, filtering, and pagination. Each project will teach you something new and bring you one step closer to becoming a confident backend developer.
Frequently Asked Questions
What is a REST API and how does it work?
A REST API, or Representational State of Resource API, is an architectural style for designing networked applications. It works by sending and receiving data in a structured format, such as JSON or XML, to perform operations like creating, reading, updating, and deleting data. This allows different systems to communicate and exchange data with each other.
What are the most common HTTP methods used in REST APIs?
The most common HTTP methods used in REST APIs are GET, POST, PUT, and DELETE. These methods are used to retrieve, create, update, and delete data, respectively. Understanding the purpose of each method is essential for working with REST APIs.
How do I authenticate with a REST API?
Authentication with a REST API typically involves providing a username and password, or an API key, in the request headers or query parameters. Some APIs may also use more advanced authentication methods, such as OAuth or JWT tokens. The specific authentication method used will depend on the API and its requirements.
What is the difference between a REST API and a GraphQL API?
A REST API and a GraphQL API are both used for data exchange, but they differ in their approach. REST APIs use fixed endpoints and return fixed data, while GraphQL APIs allow clients to specify the data they need and return only that data. This makes GraphQL APIs more flexible and efficient, but also more complex to implement.
How do I handle errors in a REST API?
Errors in a REST API are typically handled using HTTP status codes, which indicate the result of a request. Common error codes include 404 Not Found, 500 Internal Server Error, and 401 Unauthorized. By checking the status code and error message, clients can determine the cause of the error and take appropriate action.
